Hi everyone! It seems to me like it's been years since I have made a post here. Things run very quickly in my life with lots of outdoor activities for kids and us. Lots of rehearsals and study for music so less time for scrapping for me. There are some days (nights, actually!) that I say I will scrap and then I'm so tired that I end up with a good night's sleep... Anyway...
Today I have a new mini album to show you that I created with amazing DT kit from Memories Trend. It was a yummy kit with lots of springy Graphic45 papers! I used Laura Denison's Stack the deck book binding method which I love!!!


And now here is a little photo-tutorial for the album. I take 6 envelopes and glue their opening. Then I cut their 2 opposite sides in order to make two side openings. They will now measure 6' 1/4 in.x 5' 1/8 in. I used 3 longside craft envelopes which I cut in half to take the 6 envelopes that I used as my mini album's pages. Then I distressed their edges using the wonderful Kaisercraft ink (island).

I then cut from cardstock 3 channels to form the binding spine. They measure 5x1 1/4 in (score at 1/2 & 3/4), 5x1 1/2 (score at 1/2 & 1) and 5x1 3/4 (score at 1/2 & 1 1/4). You glue them the one on the other putting down the wider one so that you create a spine with 6 "feet" that you will put inside the one open side of the envelopes.


Then I prepared the cover. I used two pieces of chipboard measuring 6x6 3/4 in. and one piece that measures 6x1 1/8 in. (the last one is for the spine). I cover the two pieces with patterned paper like this:


Today I have a new mini album to show you that I created with amazing DT kit from Memories Trend. It was a yummy kit with lots of springy Graphic45 papers! I used Laura Denison's Stack the deck book binding method which I love!!!


And now here is a little photo-tutorial for the album. I take 6 envelopes and glue their opening. Then I cut their 2 opposite sides in order to make two side openings. They will now measure 6' 1/4 in.x 5' 1/8 in. I used 3 longside craft envelopes which I cut in half to take the 6 envelopes that I used as my mini album's pages. Then I distressed their edges using the wonderful Kaisercraft ink (island).

I then cut from cardstock 3 channels to form the binding spine. They measure 5x1 1/4 in (score at 1/2 & 3/4), 5x1 1/2 (score at 1/2 & 1) and 5x1 3/4 (score at 1/2 & 1 1/4). You glue them the one on the other putting down the wider one so that you create a spine with 6 "feet" that you will put inside the one open side of the envelopes.

Then comes the creative and fun part! You have to decorate each page. I prefer to finish the decoration before I attach each page on the spine. I can manipulate them more easily. I used some amazing Graphic45 papers from the Botanical Tea collection that Memories Trend included in my design team kit.

I cut 12 papers 5 3/4x4 3/4 in. which I used as the background of each page and I glue them on the envelopes.

I then cut strips of paper that measure 5 3/4x2 in. on which I created a border using a border punch. I used one X-cut punch but you can use your fanourite one. I glue it on the lower part of each page puting glue only on the 3 sides (not the punched side) and this will create a pocket on each page where you can put some cut-aparts for the Graphic45 papers or photo mats and journaling spots. On some pages I created a little booklet which I decorated on the cover with fussy-cut pieces for my paper. To create this I cut a piece of cardstock which measures 4 1/4x8 1/8 in. and I scored the long side to create a 3ptych booklet. Then I glued it on the 3 sides to create a pocket for a tag on the upper side. Now you can let your creativity flow and decorate your pages with your personal taste. I used die-cuts, laces, flowers and tags, elements that I love. I'm mostly a shabby-chic style scrapper.


Then I cut a piece of cardstock that measures approximately 5 1/2x7 1/2 in. I punch its long sides and then lay down everything like this:


I pay special attention that I leave a little space between the pieces which is approximately as wide as my chipboard's thickness (I mostly use chipboard that is 1mm. thick). I also glue a ribbon a little upper than the middle of my cover which will be used to keep my album closed.
Then I cut two pieces of patterned paper to cover the inside of the cover. Each one measure 7x5 1/2. I glue them on the inside of the cover. I forgot to mention that for my ease I use a strong double sided tape to glue the cover elements. You can also use a liquid binding glue but then you will have to leave your cover under some heavy books for at least a night's time to prevent any curling of the paper.

Now you can take your inside spine with the attached envelopes-pages of the album and glue it on the inside cover spine. You have to center it firstly (see the 2nd photo of my post).
The products that I used are:
-G45-Love notes (I cut apart the frames and inserted them in each page's big pocket)
I also used some dies of Joy Crafts, Sizzix-Ellison (framelits), Spellbinders and Marianne Design (the little tags) but you can find similar dies in the store.
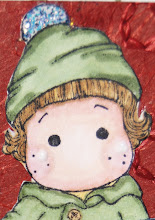
I decorated my cover with fussy-cut pieces from the patterned paper, die-cuts from the amazing Spring greenery die, little paper flowers and a little string of tiny pearls.
I hope that you enjoyed my post (though it was veery long!) and my mini album. Please visit Memories Trend for even more inspiration from my fellow DT members and some wonderful products!
I'm wishing you all the best!


.JPG)


Τι όμορφο Χριστίνα και ποσο προσεγμένη δουλεια!
ΑπάντησηΔιαγραφήsteroid satın al
ΑπάντησηΔιαγραφήheets
Hİ3LW